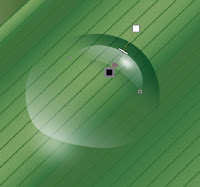
 Make
this image includes many tools involved, so a bit tricky to put into
practice, but if you carefully consider seriously then it would not
overly complicated, especially when in front of monitors available
especially tasty and crispy snacks plus a cup of coffee bitter / sweet,
hem .. .. will seem fascinating, violence linger long in front of the
computer.
Make
this image includes many tools involved, so a bit tricky to put into
practice, but if you carefully consider seriously then it would not
overly complicated, especially when in front of monitors available
especially tasty and crispy snacks plus a cup of coffee bitter / sweet,
hem .. .. will seem fascinating, violence linger long in front of the
computer.Okay let's get started ....
First Instance, Create Leaf;
In the Toolbox click the Freehand tool to make triangles for pointer
clicks Freehand tool leaves the work area -> doubel click on
somewhere else -> point at the start node to an end, and set the
Shape tool to roughly resemble the shape of the leaves.
Create a box with the Rectangle tool and activate the Mesh fill tool add
nodes to put a texture shadow color, then enter the results box on the
object mesh leaves.
Give 50% transparent effect is the result as shown below;
Draw lines with the intent of the whole leaf leaf fiber and then
replicated with press + on the numpad, slide to the edge of the leaf,
then double click the Blend tool to let quickly and neatly arranged;
And holding the line on the edge of the leaves had been set on the edge
of the leaf with the Shape tool and do not forget to press Alt + Z (Snap
to objects) so that the line can be attached to the sides of the leaf
edge.
The result is like this;
Create a box with the Rectangle tool and set texture color with Mesh Fill tool as Background
The second step Creating Water Drops
Create a circle with the Ellipse tool object and press Ctrl + Q to
convert to curve and set a circle according to the leaf surface shape;
Give white color, clear outline of the Color Palette, and then adjust
the transparency of objects circle the Transparency Tool in the Toolbox
Duplicate the circle and set the transparent effect on the other, making it a dark color.
Create object as shown below and adjust the transparency of the color with the intent of the effect of light.
Duplicate again the circle object to press + on the numpad and then set
the transparency and the large circle to be object shadow
Duplicate several times and adjust the size of the object with the Pick Tool .... finish ....
The end result is as shown below ...
If we want a little effect on the final result, then we design will appear more concrete with the following steps;
On the Menu Bar Choose Convert to Bitmap .... (but do not forget to copy
your design first if there will be changes), then click on Menu Bar
Effects -> Adjust -> Brightness / Contrast / Intensity ...
Then perform the command box to set the Brightness / Contrast /
Intensity ... type -20, 20, 20 or set the sliders according to your
creativity ...
The results are as shown below, and this is the image that is so, and can be displayed on your friends ...


How To Make Water Drops With Coreldraw ~ Connet To Multimedia >>>>> Download Now
ReplyDelete>>>>> Download Full
How To Make Water Drops With Coreldraw ~ Connet To Multimedia >>>>> Download LINK
>>>>> Download Now
How To Make Water Drops With Coreldraw ~ Connet To Multimedia >>>>> Download Full
>>>>> Download LINK 5P